


Worm Farms 101: Everything you need to know
Worm farms are the perfect way for people who don’t have space for a compost system to dispose of their food scraps.
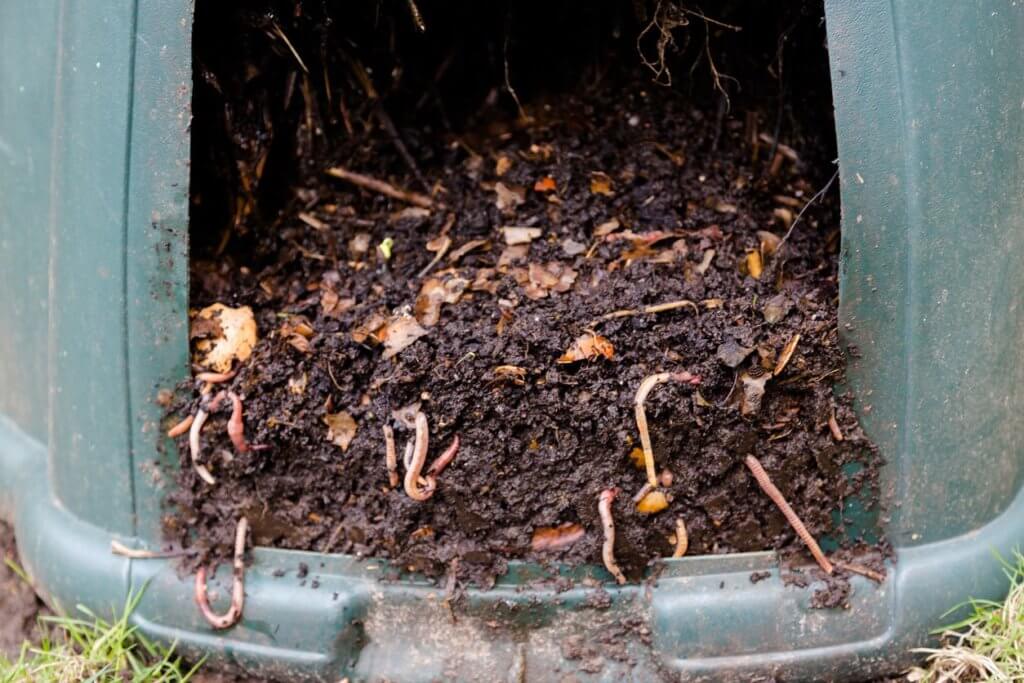
In a worm farm, tiger worms eat food waste and other organic matter such as leaves and paper. Their byproducts – known as castings and liquid tea – are collected and can be applied to your garden as fertilizer.
Why should you have a worm farm?
Worm farms are ideal for people who have limited space or don’t have a garden, as they can be kept inside (such as in a garage or basement).
While worm farming may sound daunting, it is actually less technical than composting. However, the worms do require a little care and they need time to build up their population in order to process large amounts of food scraps.
What you need for a worm farm:
- Worm bin/tower
There are two types of worm farms – the stacked worm farm and the continuous flow barrel. A stacked worm farm is just as it sounds – different layers stacked on top of each other with a tap or outlet at the bottom for collecting the worm tea. A continuous flow barrel consists of one large container that has holes in it to allow for the worm tea to drain and for air circulation. Click here for a more detailed explanation on the two types of worm farms.
Worm farms can be purchased from Hungry Bin or from hardware stores like Bunnings, Warehouse or Mitre 10. - Worm bedding
You will need to fill your worm farm about three quarters full with worm bedding for the worms to live in. Items such as potting mix, soil, hay, compost, dead leaves, pet bedding, coconut fiber or shredded cardboard or paper can be used as the bedding. The bedding needs to be porous and moist. - Container to collect the worm tea in such as an empty bottle
- Worms
The best types of worms to use in worm farms are red or tiger worms – they aren’t the ordinary worms that you will find in your garden. These worms can be purchased from hardware stores or online. They are sold by the kilo. You will need about 2000 worms or 500 grams of worms to start your farm with. - Food scraps to feed to the worms
- Newspaper or brown matter to feed the worms
How to worm farm:
Note: This is just a general guide, please follow the instructions that comes with your worm bin.
- Pick a shady spot to place your worm bin as worms need to be kept cool. A covered area such as a carport or porch is perfect.
- Add the worm bedding to the worm bin (refer to the instructions on your bin as to how much you should use) and add your worms to the bedding.
- Over a few weeks, slowly add food scraps (see below for a list of what food scraps you can feed your worms) to the bedding and monitor your worms to make sure that they are eating it all.
- Cover the food waste in the bin with a damp carpet, newspaper or cardboard to provide a moist dark environment that encourages your worms to actively eat your food waste.
- Once you have several full layers in the stacked system or the continuous flow system is two-thirds full, you can begin harvesting the worm castings.

What to feed your worms:
Worms like a ratio of 70% green waste to 30% brown waste.
Green matter is nitrogen rich materials like fruit and vegetable scraps, coffee grounds and tea bags, egg shells and manure from small animals like rabbits and guinea pigs. Cut food into small pieces (smaller than a golf ball) so the worms can break it down before it starts to rot.
Brown matter is carbon rich materials like torn up paper or cardboard or leaves.
There are some foods that you should not feed your worms because they are very likely to irritate or kill your worms, as well as encourage mould to grow instead of being eaten by worms.
Foods you should not feed your worms:
- Spicy food, chili, onion and garlic
- Meat and milk products
- Bread and pasta
- Cooked or processed food
- Citrus or acidic foods (though small amounts are OK)
- Oils and liquids such as soup
How to grow your worm farm:
It will take time for your worm population to increase and it is important that you don’t give the worms more food than they can handle. Worms can only eat their weight of food in a day. So if you have bought 500 grams of worms you shouldn’t put more than 500 grams of food scraps per day. As the worm population increases then you can add more food scraps. So start with small amounts of food scraps and slowly increase to match until you notice that the worms can eat through all of the food waste very quickly. Food scraps should be added regularly, every 1 -2 days.
How to harvest worm castings:

The worm castings are ready to be removed when the contents look like a fine, dark compost at the bottom of your bin. There shouldn’t be many worms left in this layer. Spread the worm castings over your garden beds and then mix them through the soil. Castings are very rich in nutrients so they cannot be planted in directly, meaning they can’t be used as a substitute for soil.
What to do with the worm tea:
The worm tea is the liquid that will collect at the bottom of your worm farm. Always let the liquid drain freely into a separate bucket, or if your worm farm has a tap, leave it open with a bottle underneath, to catch the tea.
Dilute the worm tea with water (1:10) before using as a fertilizer. Apply to plant roots every 2-4 weeks.
Click here for more information about worm farming.
Lead image: IStock.com / Tommy Lee Walker


